Deploying ownCloud 9 on Fedora 23
I’ve been playing around with server/VM provisioning lately and have come across a need to store some basic deployment files in the cloud. For me, these are things like ansible code, a home directory .tar file, among a few other personal items. With ownCloud 9 being recently released, I thought I should give it a try. Digging further into its features I see that ownCloud can federate many external cloud storage solutions (Dropbox, GoogleDrive, etc.) – cool! Another useful feature is that ownCloud can enable encryption on any personal data in addition to the encryption methods used by Dropbox and Google. This will provide an additional layer of encryption in case that Dropbox or Google’s data is compromised and decrypted, my data will still be protected by my own encryption keys. That adds a nice layer of safety for my personal data, so lets do a deployment and connect ownCloud to GoogleDrive to start.
The first thing I started with was a fresh install of Fedora 23 server. (I originally tried CentOS but ran into some out-of-date package issues with nss). With ownCloud 9 being so new, it’s not yet included in Fedora’s standard repos, so I did an install from source. You can download the source from owncloud.org, verify with MD5/SHA256 and/or GPG, and continue with my steps below. I used the following two links to help with my install. Manual installation of ownCloud, and ownCloud installation from the command line. Firstly, ownCloud uses a web and database server on the back end. You’re free to chose your own flavours of each, for me I chose apache and mysql(mariadb). When installing from source, you’ll need to manually install your web and database server prior to ownCloud:
dnf install httpd mysql mysql-server
Also, there’s a whack of PHP modules you’ll need. I cheekily grabbed a list of these from the Fedora packaged ownCloud 8 installation – it parses all the dependencies for you. I issued a dnf install owncloud command to get all the PHP dependencies, then awk’d them out of the output. I put them in a file, and installed with a for loop:
[root@owncloud ~]# cat /root/phprpms:
php
php-Assetic
php-PHPMailer
php-PsrLog
php-aws-sdk
php-bantu-ini-get-wrapper
php-channel-dropbox-php
php-channel-phpseclib
php-channel-sabredav
php-cli
php-common
php-doctrine-annotations
php-doctrine-cache
php-doctrine-collections
php-doctrine-common
php-doctrine-dbal
php-doctrine-inflector
php-doctrine-lexer
php-dropbox-php-Dropbox
php-gd
php-getid3
php-google-apiclient
php-guzzle-Guzzle
php-intl
php-ircmaxell-random-lib
php-ircmaxell-security-lib
php-ldap
php-lessphp
php-mbstring
php-mysqlnd
php-natxet-cssmin
php-opencloud
php-pdo
php-pear
php-pear-Auth-SASL
php-pear-Cache-Lite
php-pear-DB
php-pear-HTTP-OAuth
php-pear-HTTP-Request2
php-pear-Log
php-pear-MDB2
php-pear-Mail
php-pear-Net-SMTP
php-pear-Net-Socket
php-pear-Net-URL2
php-pecl-jsonc
php-pecl-oauth
php-pecl-zip
php-phpseclib-crypt-aes
php-phpseclib-crypt-base
php-phpseclib-crypt-blowfish
php-phpseclib-crypt-des
php-phpseclib-crypt-hash
php-phpseclib-crypt-random
php-phpseclib-crypt-rc4
php-phpseclib-crypt-rijndael
php-phpseclib-crypt-tripledes
php-phpseclib-crypt-twofish
php-phpseclib-math-biginteger
php-phpseclib-net-sftp
php-phpseclib-net-ssh2
php-pimple-lib
php-process
php-sabre-dav
php-sabre-vobject
php-sabredav-Sabre
php-sabredav-Sabre_VObject
php-scssphp
php-symfony-browser-kit
php-symfony-class-loader
php-symfony-common
php-symfony-config
php-symfony-console
php-symfony-css-selector
php-symfony-debug
php-symfony-dependency-injection
php-symfony-dom-crawler
php-symfony-event-dispatcher
php-symfony-expression-language
php-symfony-filesystem
php-symfony-finder
php-symfony-http-foundation
php-symfony-http-kernel
php-symfony-process
php-symfony-routing
php-symfony-var-dumper
php-symfony-yaml
php-twig
php-xml
t1lib
[root@owncloud ~]# for i in `cat /home/aludwar/phprpms`; do dnf install $i -y; done
That should take care of the prerequisites (you can compared with ownCloud’s docs, and php -m | grep ‘module’ if you like). Then I enabled and started each service:
systemctl enable httpd
systemctl enable mariadb
systemctl start httpd
systemctl start mariadb
For additional security, I’ll install SSL capability on the web server. First by installing mod_ssl, then generating a self-signed SSL certificate, and adding it to the apache config:
dnf install mod_ssl
cd /etc/pki/tls/certs/
openssl req -newkey rsa:4096 -nodes -keyout owncloud.ludwar.ca.key -x509 -days 3650 -out owncloud.ludwar.ca.crt
vi /etc/httpd/conf.d/ssl.conf
...
SSLCertificateFile /etc/pki/tls/certs/owncloud.ludwar.ca.crt
...
SSLCertificateKeyFile /etc/pki/tls/certs/owncloud.ludwar.ca.key

systemctl restart httpd
Also, it’s a good idea to run the secure installation/setup of mysql(mariadb), which you can do by running this utility and following the prompts:
mysql_secure_installation
Ok! Now after a quick check of everything working, we’re ready to start installing ownCloud. To start we’ll untar the files into the default web directory, and add the owncloud config into apache:
cp -rp owncloud-9.0.0.tar /var/www/html/
tar -xvf owncloud-9.0.0.tar
vi /etc/httpd/conf.d/owncloud.conf              (add in the below)
Alias /owncloud "/var/www/html/owncloud/"

<Directory /var/www/html/owncloud/>
 Options +FollowSymlinks
 AllowOverride All

<IfModule mod_dav.c>
 Dav off
 </IfModule>

SetEnv HOME /var/www/html/owncloud
SetEnv HTTP_HOME /var/www/html/owncloud

</Directory>
Then we’ll need to make some SELinux permission changes. I highly recommend you DO NOT disable SELinux. Depending on your setup, there may be additional SELinux changes you’ll need to make.
semanage fcontext -a -t httpd_sys_rw_content_t '/var/www/html/owncloud/data'
restorecon '/var/www/html/owncloud/data'
semanage fcontext -a -t httpd_sys_rw_content_t '/var/www/html/owncloud/config'
restorecon '/var/www/html/owncloud/config'
semanage fcontext -a -t httpd_sys_rw_content_t '/var/www/html/owncloud/apps'
restorecon '/var/www/html/owncloud/apps'
My data directory is on an NFS share from another computer, so I need to make an additional SELinux change:
setsebool -P httpd_use_nfs on
Now, onto the database initialization. The below install command is right out of ownCloud’s docs, make sure your default web directory is owned by the httpd daemon user, and run the install command:
cd /var/www/html/owncloud/
chown -R apache:apache /var/www/html/owncloud/
sudo -u apache php occ  maintenance:install --database "mysql" --database-name "owncloud" --database-user "root" --database-pass "password" --admin-user "admin" --admin-pass "password"
ownCloud is not installed - only a limited number of commands are available
ownCloud was successfully installed
Now you should be able to browse to https://localhost/owncloud to login! Depending on if you’re accessing the owncloud host locally or from another server, you may need to add the domain to the trusted domains list in /var/www/html/owncloud/config/config.php. The web GUI should alert and prompt you to do that, but if not, you can modify the file directly. Here’s my config.php file with the password data omitted:
[root@owncloud conf.d]# cat /var/www/html/owncloud/config/config.php
<?php
$CONFIG = array (
 ...
 'trusted_domains' =>
 array (
 0 => 'localhost',
 1 => '192.168.1.100',
 2 => 'owncloud.ludwar.ca',
 ),
 'datadirectory' => '/var/www/html/owncloud/data',
 'overwrite.cli.url' => 'http://localhost',
 'dbtype' => 'mysql',
 'version' => '9.0.0.19',
 'dbname' => 'owncloud',
 'dbhost' => 'localhost',
 'dbtableprefix' => 'oc_',
 ...);
[root@owncloud conf.d]#
Once in the GUI, you can enable encryption from the admin menu at the far right. Server side encryption can be enabled with a checkbox. It’s also good to enter a recovery key in the event you need to recover your encrypted data:
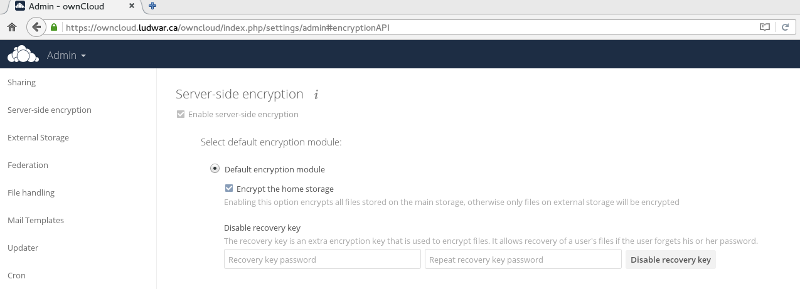
Then you need to install the default encryption app. First at the top left, switch from files to apps, then click on not enabled, and find and enable the default encryption module. You may need to logout and back in again for the keys to initialize.

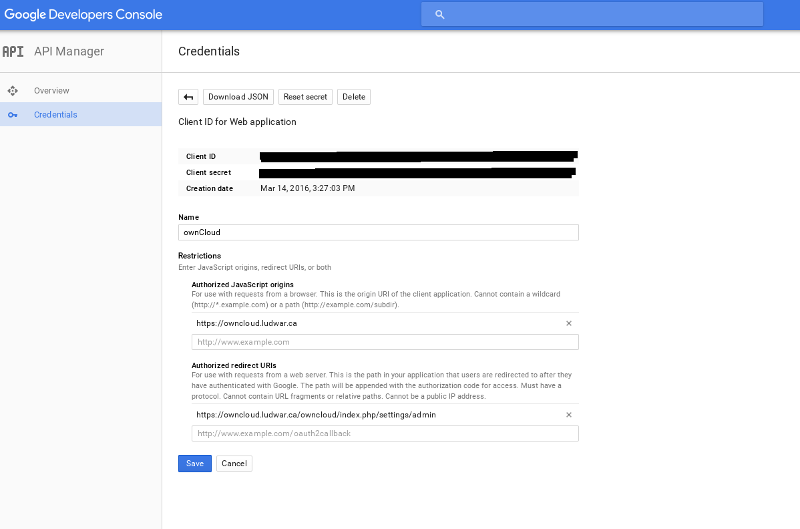
Now, to add external storage from Google Drive, you’ll need to enable API access and create OAuth2 credentials in your Google account. You can do this by visiting https://console.developers.google.com/apis/credentials, and creating a project, then creating OAuth2 credentials within that project. This will give you a ClientID and Client Secret to enter into ownCloud. ownCloud will access your Google Drive data via Google’s API. Here’s what mine looks like, and I also needed to add my domain and a redirect URI for Google to redirect the user (web browser) after authenticating:

Google Dev Console
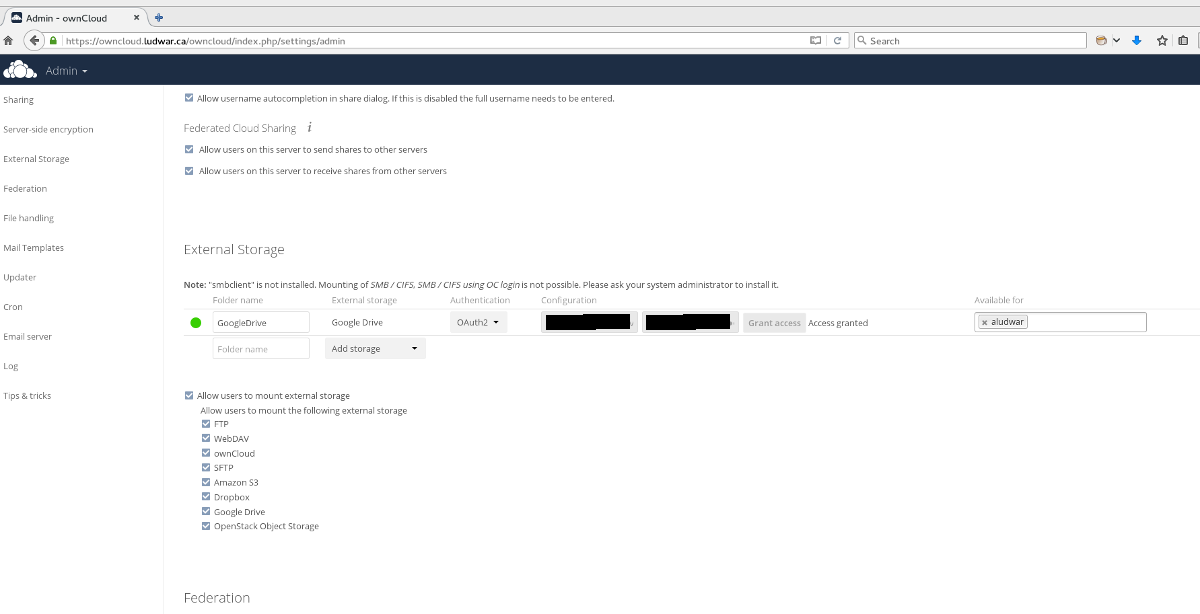
In the admin section again, you can enter those Client ID and secret details, add the user you’re giving access to the storage, and click grant access:
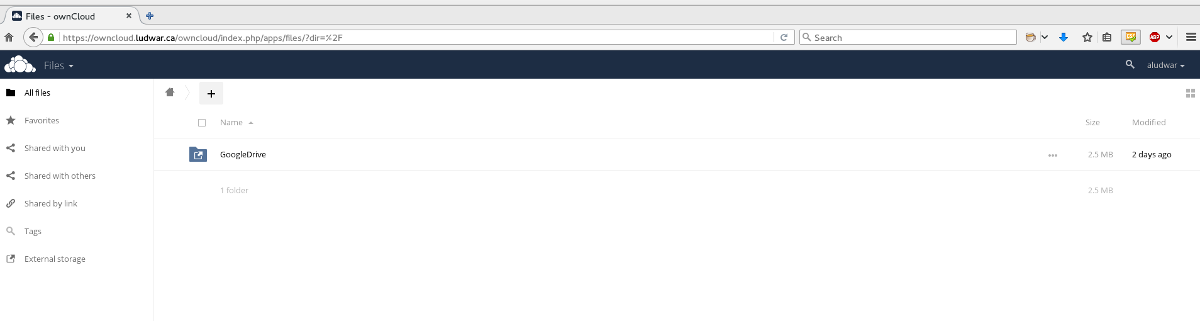
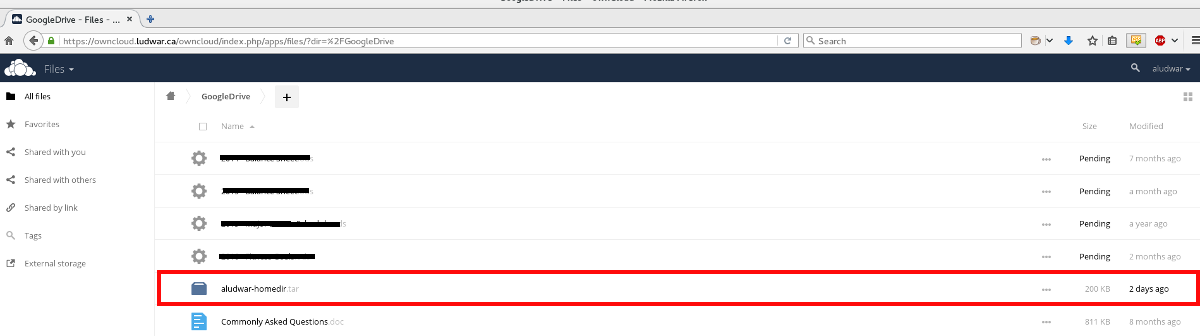
Now login as that user, and your Google Drive files will be available!
This ended up being relatively long, so I’ll cover further work in an additional post. 🙂